I've been gone for over a month visiting with family and was then whisked away by hubby for a surprise trip out to Victoria, BC for a week as an early anniversary present. Wow, what an awesome time I've had and the scenery was stupendous. We will definitely go again.
This is my first post and project after coming back from holidays last week so I'm a bit rusty. It's been a slow week for me too as I've been a under the weather since getting back. Plus, I've had to duke it out with my laptop for the past few days as I had a gazillion technical difficulties uploading pictures. But all in all I can't complain cause I'm on a happy high from these past few weeks away.
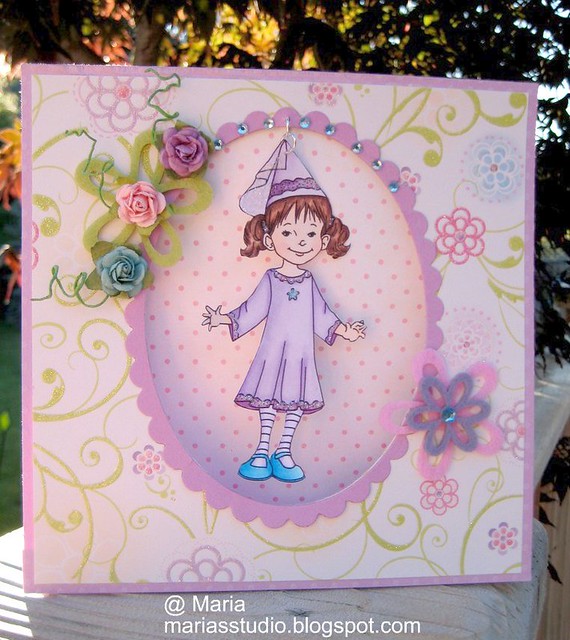
I prepared this tutorial for yesterday's post over at The TownScrapper Blog. On Wednesdays, we provide tips, tricks and/or tutorials so checkout the latest. This tutorial describes the steps for making a tent card with a dangling image. I just love this technique cause it's so much fun, fast and easy to make. This card is for my niece who just turned 7 and I think she will be surprised to see this cute Magical Sophie dangling on her card. Magical Sophie is an exclusive Victoria Case image for The Townscrapper. Contact Phebe at 519-882-0623 or email her at info@townscrapper.com to get your hands on this sweetie.
I'm entering the card into the following challenges:
- Practical Scrappers - Flowers
- The Crazy Challenge - All Things Spotty
- Crafty Creations - Shine (hard to see but I added Stickles to her veil, star and trim on hat and dress)
- Stampavie - Sparkling (Stickles added to veil, star & trim on hat and dress)
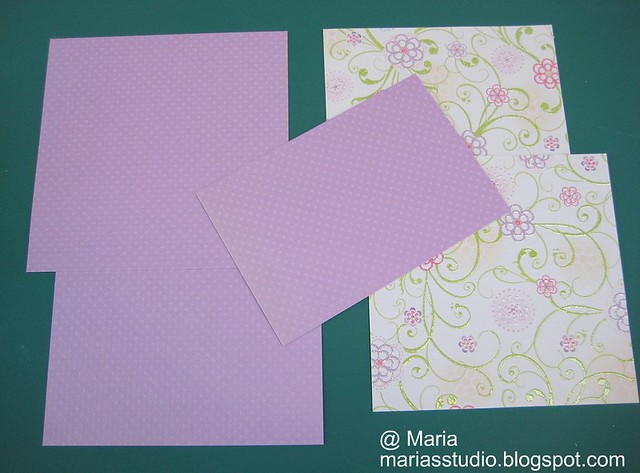
Step 1: Cut 3 pieces of cardstock: 2 pieces into 6" x 6" and 1 piece into 2" x 5.5". These will form the front and back of your card. Then cut 2 pieces of Designer Paper into 5.75" x 5.75" (oops, I ended up using one DP for the inside of the card and then a different DP for the outside of the card).
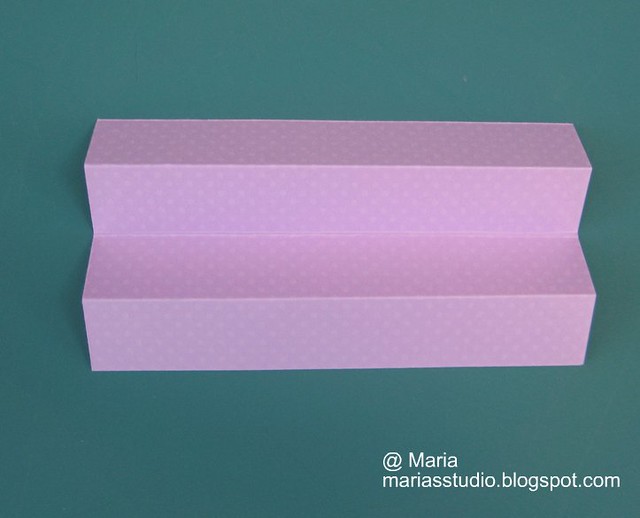
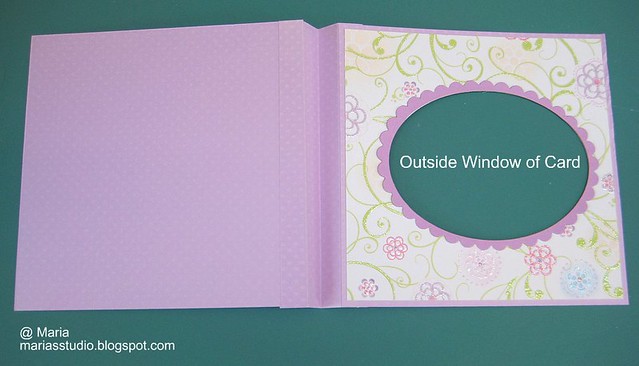
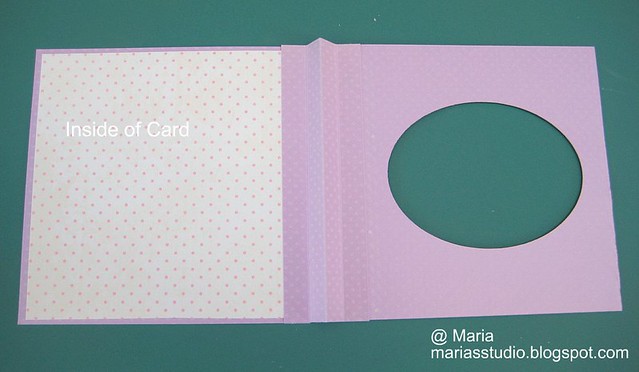
Step 3: Glue the DP to the CS and then cut out a 'window' (shape) so you can dangle your image. I try to centre the window so there's room at the top to dangle the image but still enough room at the bottom so you don't see the folded pieces of cardstock. Attach the front and back pieces of cardstock to the folded mountain and valley piece. I've included 2 pics: one showing the inside DP and the other showing the outside DP.
Step 4: Decorate the front of your card, punch a hole where you want your image to dangle, attach a jump ring to your image and then attach image to front of card.
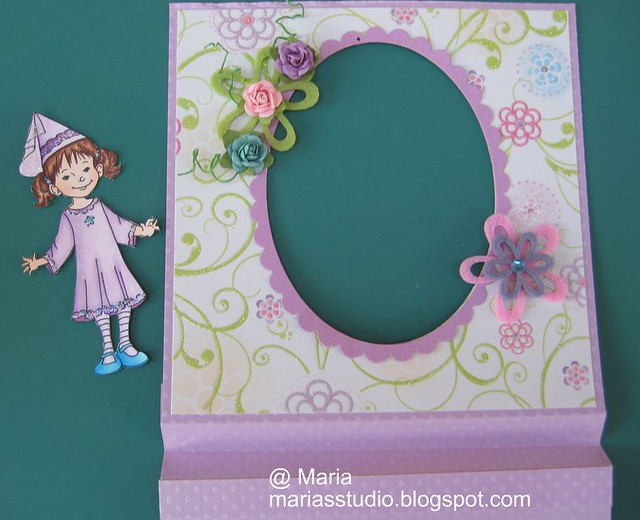
Step 5: Glue tops of card together to form a tent when the card is in the upright position.
Thank you for visiting today and I hope you've enjoyed your visit.
Hugs,
Maria
8 comments:
lovely card. Wonderful colors and so cute little fairy.
Hi Maria,
such a lovely card.
Great tutorial too, thanks for sharing.
Love the sparkles on the papers.
Luv,
Chelsea
What a beautiful tent card Maria and an easy to follow tutorial too, your card is very summery looking and I love the flowers too.
hugs
Donna xx
welcome ...missed you...love the card....and thanks for the tutorial
I have already told you I think she is adorable but I am telling you again. Just popped by and I still love her. :) Love the purple dress with those bright blue shoes. Hugs hun xxoo
Hi
what a stunning card, so beautiful, thank you for joining us at Stampavie and more.
Hugs Kaylou xoxo
thanks for all the time you invested in this tutorial, I may actually try this one.
What a cute idea! When I was a little girl, receiving a card that was special and out of the ordinary was something I treasured and kept. Something as sweet as this would have definitely been a keeper! I am going to have to make some!
Thanks for sharing! :o)
Post a Comment